
How to Make Nitro Coffee Brew: A Step-by-Step Guide
Nitro coffee is the latest craze in the coffee world. It’s a rich, smooth, and creamy cold brew infused with nitrogen gas, creating a unique, velvety texture and a thick, foamy head that’s reminiscent of a stout beer. The result is a coffee experience that’s both refreshing and indulgent, with a subtle sweetness and a creamy mouthfeel—without the need for dairy or sugar.
Making nitro coffee at home may sound like something only a barista at a high-end café could do, but with the right tools and some simple steps, you can easily create this exciting brew at home.
In this blog, we’ll walk you through how to make nitro coffee at home, explain the equipment you need, and offer tips for creating the perfect cup.
What You’ll Need to Make Nitro Coffee
To make nitro coffee at home, you'll need a few specialized tools and ingredients. Here’s what you’ll need:
Essential Equipment:
- Cold Brew Coffee: You’ll want to start with cold brew coffee, as it's smoother and less acidic than regular brewed coffee, making it ideal for infusing with nitrogen. You can either purchase pre-made cold brew or make your own (we’ll cover this in a bit).
- Nitrogen Gas: Nitrogen is the key to creating the signature creamy texture of nitro coffee. You'll need a nitrogen tank, and it's important to use food-grade nitrogen (N2) for safety and flavor.
- Nitro Coffee Maker: This is a keg or a special coffee dispenser that can hold the cold brew coffee and inject nitrogen into it. A coffee keg or nitro coffee dispenser comes with the necessary fittings to attach to the nitrogen tank.
- CO2 or Nitrogen Regulator: This will allow you to control the amount of pressure used to carbonate the coffee with nitrogen.
- Coffee Keg or Dispenser: This is the vessel where the coffee is stored and where the nitrogen infusion happens. You’ll need a keg or dispenser designed for nitro coffee to help with dispensing the brew properly.
- Coffee Filter or Cheesecloth (for making cold brew): If you plan to make your own cold brew coffee, you’ll need a method to filter out the coffee grounds.
- Optional: Flavorings: If you want to add some extra flavor, you can experiment with flavorings like vanilla, cinnamon, or sweeteners such as simple syrup. However, the beauty of nitro coffee lies in its natural sweetness, so it's often best enjoyed black.
Step 1: Make Cold Brew Coffee
Before you can make nitro coffee, you need cold brew coffee as your base. Cold brew coffee is made by steeping coarsely ground coffee beans in cold water for an extended period of time, usually between 12 to 24 hours. This method produces a smoother, less acidic coffee that works perfectly for nitrogen infusion.
How to Make Cold Brew Coffee:
-
Ingredients:
- Coarse ground coffee (about 1 cup)
- Cold or room-temperature water (about 4 cups)
- A jar or pitcher
-
Instructions:
- Combine the ground coffee and water in a jar or pitcher. Stir well to ensure the coffee grounds are fully saturated.
- Cover the jar and let it steep at room temperature or in the fridge for 12-24 hours.
- After the steeping time, strain the coffee using a fine-mesh strainer, coffee filter, or cheesecloth to remove the grounds. You should have a smooth, concentrated cold brew concentrate.
-
Optional: If you like your cold brew on the sweeter side, you can mix in a bit of sweetener or flavorings like vanilla or cinnamon at this stage, but for nitro coffee, many people prefer to keep it simple and unsweetened.
Step 2: Set Up the Nitro Coffee Maker
Now that you’ve got your cold brew ready, it’s time to transfer it to the nitro coffee maker. This could be a coffee keg or a nitro coffee dispenser designed for injecting nitrogen into your brew.
- Fill the Keg: Carefully pour your cold brew coffee into the coffee keg or nitro coffee dispenser, leaving some room at the top to allow for the nitrogen infusion.
- Attach the Nitrogen Tank: Connect your nitrogen gas tank to the keg using the appropriate regulator. Make sure the tank is filled with food-grade nitrogen (N2), as this is what will infuse the coffee with that smooth, creamy texture.
- Adjust the Pressure: Set the nitrogen pressure to around 30-40 PSI. This is the ideal pressure range for creating the perfect nitro coffee.
- Chill the Coffee: Nitro coffee is typically served cold, so make sure your keg or dispenser is chilled to around 38-45°F (3-7°C). Cold coffee helps the nitrogen dissolve into the brew and creates that smooth, creamy texture you’re after.
Step 3: Infuse Nitrogen into the Cold Brew
Now it’s time for the magic to happen. To create that signature smooth texture and creamy head, you’ll need to infuse nitrogen into the cold brew. Here's how:
- Shake the Keg: Gently shake the coffee keg or nitro coffee dispenser for about 20-30 seconds to help the nitrogen gas mix with the coffee. Be careful not to shake too aggressively, as this could cause excessive foaming.
- Let it Sit: After shaking, let the keg sit for around 24-48 hours in the fridge so the nitrogen can fully infuse into the coffee and achieve that rich, velvety texture.
Step 4: Dispense the Nitro Coffee
After the nitrogen has had time to properly infuse into your cold brew, you’re ready to serve. The fun part is pouring it into a glass and watching that beautiful cascade of foam.
- Use the Nitro Faucet: Most coffee kegs or dispensers come with a special nitro faucet designed to dispense the nitro coffee with a creamy head. When you pull the tap, the nitrogen creates a cascade of bubbles, similar to the pour of a stout beer.
- Serve and Enjoy: Pour the nitro coffee into a glass, watching the thick foam form on top. The beer-like texture and rich crema should be visible as the coffee settles.
Step 5: Optional Flavoring and Serving
While nitro coffee is delicious on its own, you can always experiment with flavorings to add your personal touch:
- Sweeteners: If you prefer your coffee sweet, you can add syrups like simple syrup, caramel, or vanilla. It's best to add them before carbonating so that the flavors integrate better with the coffee.
- Milk or Cream: Many people enjoy adding a splash of milk or cream to their nitro coffee. This can be done after pouring, but remember that part of the beauty of nitro coffee is its smooth, creamy texture, which can be compromised if you add too much milk.
5 Recommended Nitro Coffee Kegs and Dispensers
If you're ready to start making your own nitro coffee at home, here are some great nitro coffee kegs and dispensers you can purchase:
-
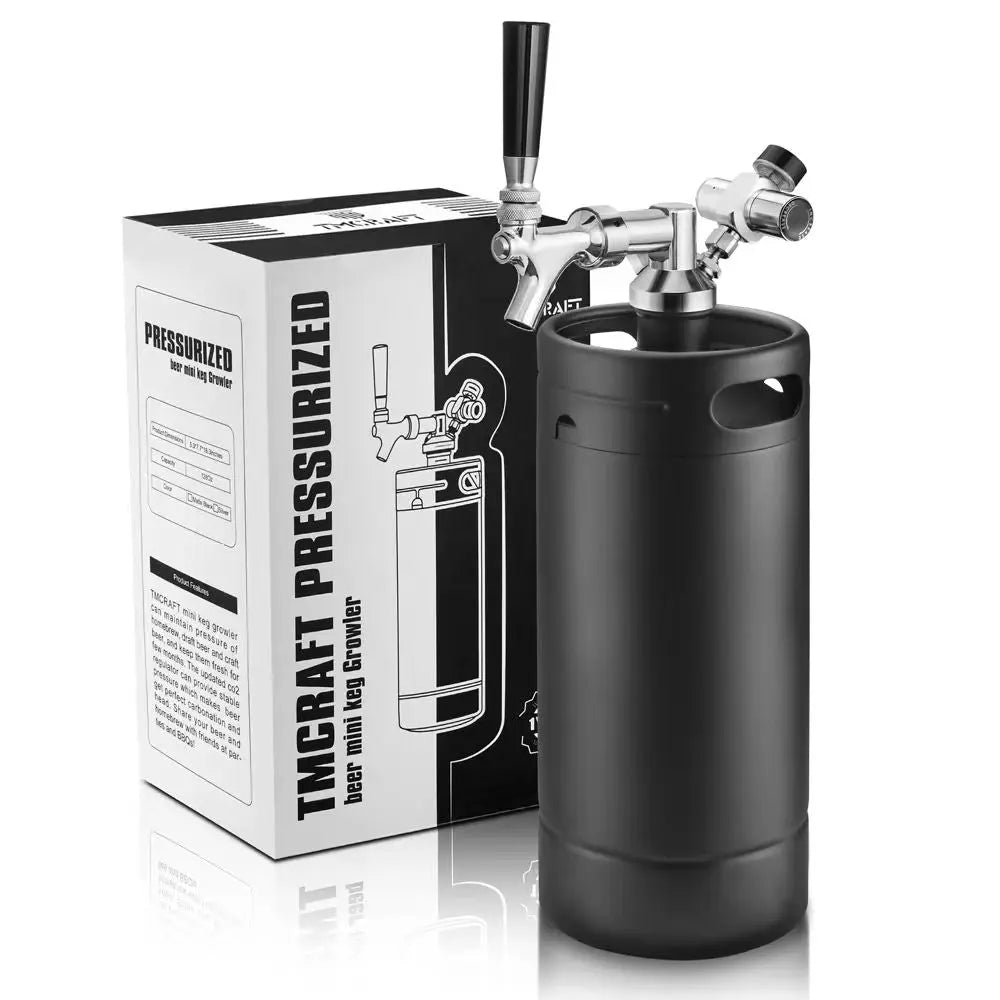
TMCRAFT Nitro Coffee Keg
- Features: A high-quality 128oz keg, designed specifically for making nitro coffee. The upgrade faucet technology ensures excellent pressure and temperature retention.
- Purchase Link
-
Kegco 5 Gallon Nitro Coffee Keg
- Features: This durable stainless steel keg comes with a nitrogen keg setup, perfect for homebrew nitro coffee.
- Purchase Link
-
NitroBrew Nitro Coffee Maker
- Features: A portable and compact nitro coffee maker that’s easy to use at home or on the go. Includes a nitrogen cartridge and all necessary accessories.
- Purchase Link
-
Coffeeboxx Nitro Coffee Dispenser
- Features: A coffee keg with a built-in tap system that delivers perfectly foamy nitro coffee. Ideal for home use or small cafes.
- Purchase Link
-
NitroBrew Mini
- Features: A mini-sized, portable nitro coffee maker for small batches. Ideal for home brewers and those wanting a quick, easy setup for nitro coffee.
- Purchase Link
Conclusion
Making nitro coffee at home is an enjoyable and rewarding experience that elevates your coffee game to a new level. By following these steps, you can create rich, creamy, and smooth nitro coffee with ease. Whether you're using a nitro coffee keg, dispenser, or another setup, the key is to experiment with the process, adjust the nitrogen pressure, and enjoy the unique texture and flavor that nitro coffee offers.
With the right tools and a bit of practice, you’ll be able to enjoy café-quality nitro coffee right in your own home. So, get brewing and indulge in the creamy, smooth experience of nitro coffee!