

The Ultimate Mini Keg Guide: How to Store, Carbonate & Serve Fresh Beer at Home
SEO Focus: mini keg, homebrew kegging, carbonation tips
Mini kegs have become one of the most popular tools in homebrewing—offering portability, freshness, and draft-style serving without the bulk of a full-size kegging system. Whether you're brewing small batches, testing new recipes, or just want fresh beer on demand, a mini keg gives you big flavor in a compact, easy-to-manage package.
In this guide, we’ll walk through everything you need to know about storing, carbonating, and serving beer from a mini keg at home—plus tips on getting the best results from systems like TMCRAFT Mini Kegs.
Why Choose a Mini Keg?
Mini kegs deliver the perfect balance between convenience and quality.
Here’s why homebrewers love them:
- Portable & lightweight — ideal for parties, camping, or small fridges
- Less oxygen exposure — keeps beer fresher, longer
- Perfect for experimental batches — brew 1–2 gallons and taste the results
- Easy to clean and maintain
- Draft-quality pours at home
For many homebrewers, mini kegs are the perfect upgrade from bottling—giving you precise carbonation control and a simple serving solution.
1. How to Store Your Mini Keg Properly
Pre-Fill Cleaning Is Essential
A mini keg may look clean, but sanitizing is non-negotiable.
Before filling, always:
- Rinse with warm water
- Add a no-rinse sanitizer
- Shake thoroughly
- Let it drain upside down
A well-sanitized keg keeps your beer fresh and prevents off-flavors caused by bacteria or wild yeast.
Store Your Mini Keg Cold
Once filled, treat it like any draft beer system:
- Keep it cold (32–40°F / 0–4°C)
- Avoid temperature swings
- Store upright to protect the dip tube and pressure system
Cold storage slows yeast activity and stabilizes carbonation—ensuring you get crisp, clean pours every time.
2. How to Carbonate Beer in a Mini Keg
One of the biggest benefits of homebrew kegging is the ability to dial in your carbonation. Mini kegs allow both natural carbonation and forced carbonation, depending on your setup.
Method A: Natural Carbonation (Using Priming Sugar)
Great for beginners or for portable setups with no CO₂ tank.
How to do it:
- Calculate priming sugar (about ½–¾ tsp per liter of beer)
- Add dissolved sugar to your mini keg
- Fill with beer and seal
- Let carbonate for 7–10 days at room temperature
- Chill the keg before serving
Pros: Simple, no equipment needed
Cons: Slower, slightly less control over carbonation levels
Method B: Forced Carbonation (Using CO₂ Cartridges or Tanks)
The fastest and most precise method—ideal with TMCRAFT Mini Kegs.
Quick Carb Method
- Chill the beer inside the keg
- Set your CO₂ pressure to 20–30 PSI
- Shake gently for 2–5 minutes
- Let settle for 1 hour
- Reduce PSI to 8–12 PSI for serving
Pros: Fast, consistent, professional results
Cons: Requires CO₂ equipment
Carbonation Tips for Best Results
✔ Always chill your keg before force carbonation (cold beer absorbs CO₂ faster)
✔ Don’t over-shake—too much can cause foamy pours
✔ Start with lower PSI and adjust based on your beer style
✔ Vent excess pressure if your pours are too frothy
3. How to Serve Fresh Beer from a Mini Keg
With your beer carbonated, serving is the fun part. Mini kegs turn any counter, picnic table, or cooler into a personal tap.
Set the Right Serving Pressure
For most beer styles:
- 8–12 PSI is perfect for smooth pours
- Lower PSI for stouts or low-carb beers
- Higher PSI for highly carbonated styles like wheat beers
Keep the Keg Cold
Warm beer = foamy beer.
Place the keg in:
- A refrigerator
- An ice bucket
- A portable cooler (great for outdoor events)
Use a Quality Tap & Regulator
A good mini keg tap system ensures:
- Consistent flow
- Stable pressure
- Less oxygen exposure
- Cleaner, smoother pours
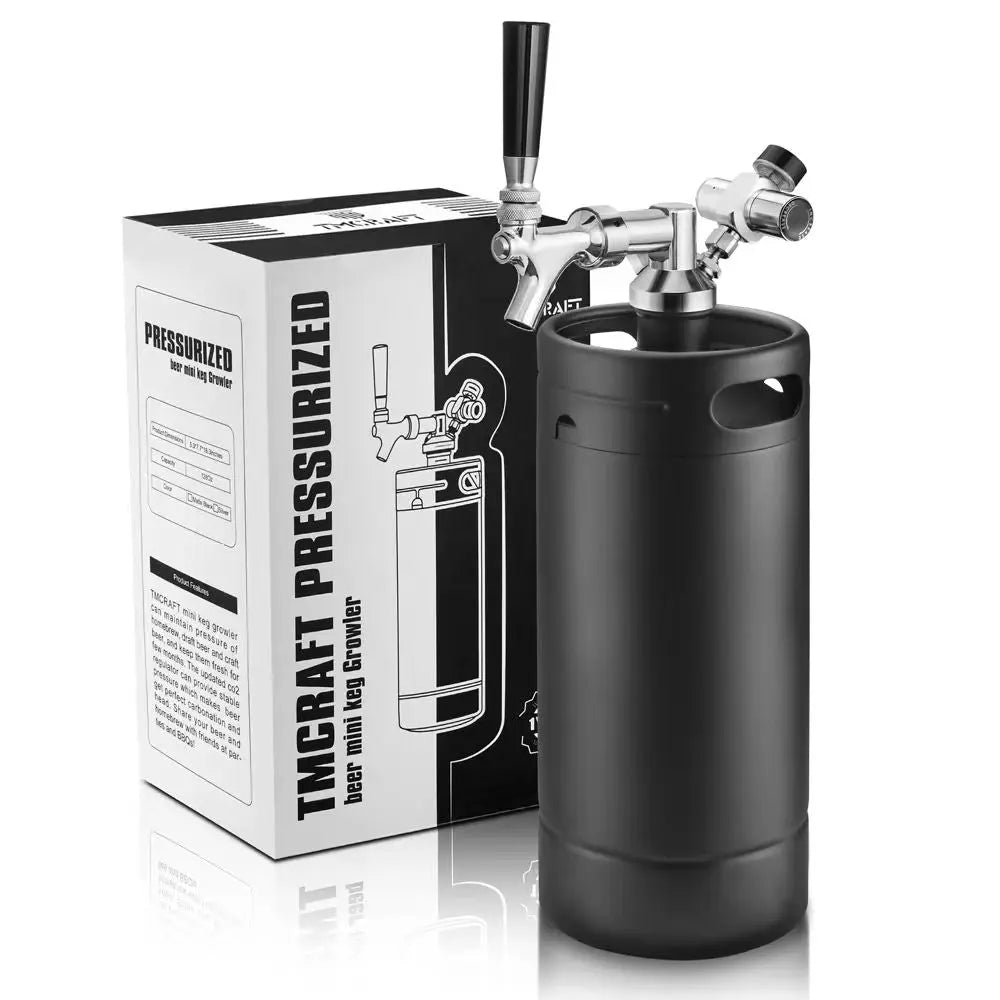
Systems like TMCRAFT Mini Kegs include stainless-steel construction, ball lock posts, and precision regulators—perfect for homebrew kegging.
Mini Keg Serving Troubleshooting
Foamy pours?
- Lower pressure
- Make sure the beer is cold
- Vent excess CO₂
Flat beer?
- Increase PSI
- Make sure the keg was fully chilled
- Check for leaks in the regulator
Slow pours?
- Increase serving pressure slightly
- Check for blockages in the dip tube
Conclusion: Fresh Beer, Anywhere, Anytime
Mini kegs deliver the best parts of draft beer—freshness, consistency, and easy serving—without the space requirements of full-size kegs. Whether you're experimenting with small-batch homebrews or simply want a portable kegging option, a well-maintained mini keg system ensures great-tasting beer every time.
With proper storage, smart carbonation techniques, and the right equipment like TMCRAFT Mini Kegs, you can enjoy bar-quality pours right at home.