
Cold Brew, Upgraded: How to Turn Your Fridge into a Nitro Coffee Station
 Keywords: Coffee Keg, Nitro Coffee, Cold Brew Setup, Home Brewing, TMCRAFT Coffee Kegs
If you're a cold brew lover, chances are you've already tried to make it at home. But if you're still pouring from mason jars or old bottles, it's time to upgrade. With the right coffee keg, you can transform your home fridge into a fully functional nitro coffee station, giving you creamy, barista-quality pours on demand.
Whether you're a caffeine connoisseur or a home brewing hobbyist, here's everything you need to know about building your own nitro setup—plus why TMCRAFT Coffee Kegs are the ultimate game-changer.
☕ What Is Nitro Coffee, and Why Does It Matter?
Nitro coffee is cold brew that's been infused with nitrogen gas to create a rich, creamy texture and cascading foam—similar to a pint of Guinness. The nitrogen enhances sweetness, adds body, and delivers a velvety mouthfeel without added sugar or cream.
With the right cold brew setup, you can enjoy this luxurious experience right from your fridge every morning—no coffee shop required.
🔧 What You Need for a Home Nitro Coffee Setup
Transforming your refrigerator into a nitro station is easier than you think. Here’s what you’ll need:
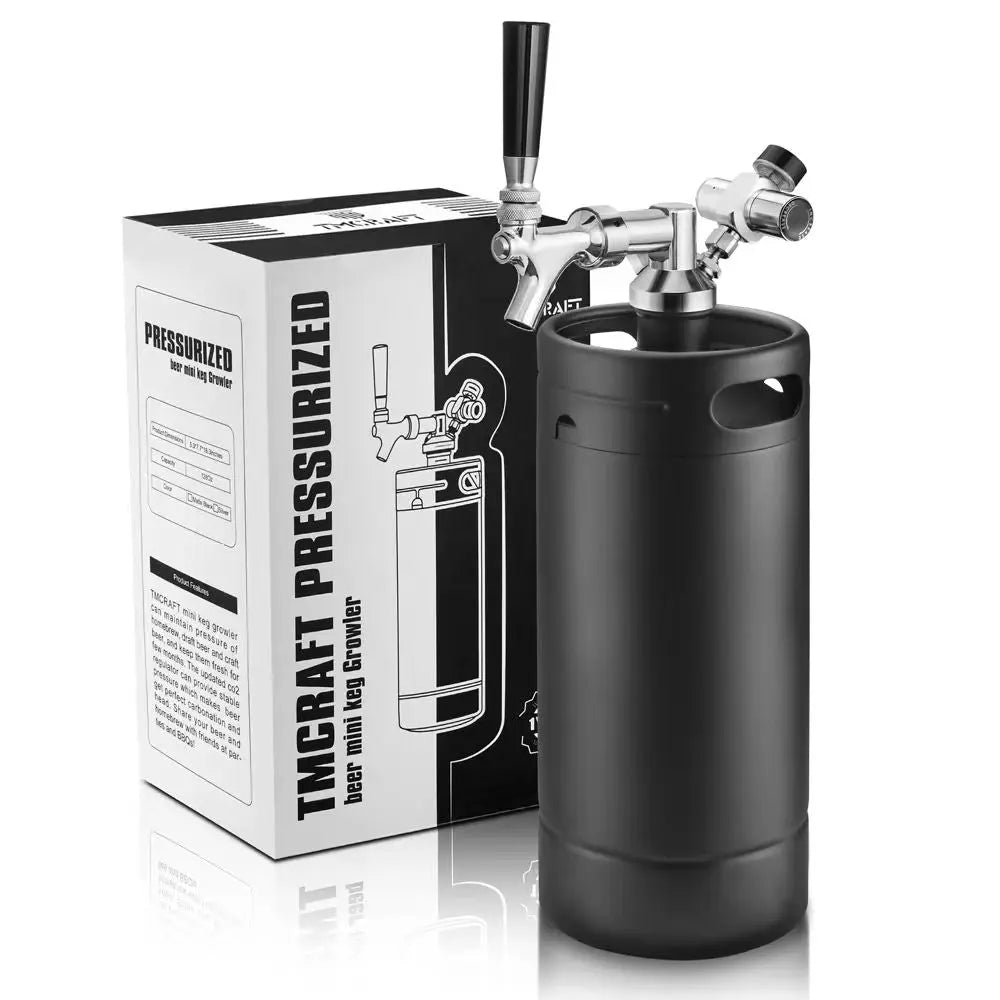
✅ 1. Coffee Keg
A pressurized keg (like the TMCRAFT Coffee Keg) is essential for holding and infusing your cold brew with nitrogen. Look for a mini keg with a tap system and regulator for easy dispensing.
✅ 2. Nitrogen Charger
To create those tiny, creamy bubbles, you’ll need N2 or N2O cartridges. TMCRAFT kegs are compatible with standard 8g nitrogen chargers.
✅ 3. Cold Brew Coffee
Make your own cold brew by steeping coarse coffee grounds in cold water for 12–18 hours. Filter thoroughly before kegging.
✅ 4. Refrigerator Space
You don’t need a full kegerator setup. A standard mini fridge or kitchen refrigerator with enough clearance can easily fit a 64oz or 128oz mini keg.
⚙️ Step-by-Step: Turn Your Fridge into a Nitro Coffee Bar
Fill the Keg with Cold Brew
- Brew your cold brew as usual. Filter well to avoid clogging the tap system.
- Fill your TMCRAFT coffee keg, leaving 1–2 inches of headspace.
Charge with Nitrogen
- Attach the nitrogen cartridge to the keg’s regulator.
- Shake the keg gently to help the gas dissolve into the coffee.
Chill and Infuse
- Place the keg in your fridge and allow it to chill and infuse for at least 4–6 hours. For best results, let it sit overnight.
Pour and Enjoy
- Dispense using the tap. You’ll see that classic nitro cascade and enjoy ultra-smooth, creamy cold brew right at home.
🏆 Why Choose TMCRAFT Coffee Kegs?
TMCRAFT’s mini kegs are designed with nitro coffee brewing in mind. Here’s what sets them apart:
- Durable stainless steel keeps your brew fresh and pressurized
- Integrated regulator and tap system for easy carbonation and pouring
- Compact and portable—fits in most home refrigerators
- Double-walled options for added insulation and temperature control
- Compatible with standard nitrogen chargers (N2/N2O)
💡 Bonus Tips for Better Nitro Coffee
- Use filtered water and freshly ground beans for the cleanest flavor
- Experiment with coffee origins and roast levels—lighter roasts bring out floral notes, while dark roasts enhance chocolate and caramel
- Add subtle flavor infusions like vanilla, cinnamon, or hazelnut during the brewing process
🚀 The Ultimate Morning Upgrade
Skip the café line and enjoy creamy, barista-level nitro coffee at home. With a TMCRAFT Coffee Keg, you can take control of your brew, customize your flavor, and impress every guest who grabs a glass from your fridge.
Whether you're a weekend homebrewer or a weekday coffee warrior, it’s time to upgrade your morning ritual—one nitro pour at a time.
☕ Ready to transform your fridge into a nitro station?
🔗 Explore TMCRAFT Nitro Coffee Kegs →