

Coffee Keg Cleaning Made Easy: A Complete Guide to Better-Tasting Cold Brew
A perfectly brewed batch of cold brew deserves more than quality coffee beans and a precise brewing process. The equipment you use to store and dispense your coffee plays an equally important role in preserving flavor and delivering a consistently enjoyable cup.
One of the most overlooked aspects of owning a coffee keg is regular cleaning. Even if your cold brew tastes great on day one, leftover coffee oils, fine particles, and naturally occurring residues can gradually accumulate inside the keg and dispensing components. Without proper coffee keg cleaning, these deposits may affect flavor, reduce dispensing performance, and shorten the lifespan of your equipment.
Whether you use your coffee keg system at home, in an office, or in a café, establishing a simple maintenance routine will help ensure every pour tastes as fresh as the first.
This guide explains why cleaning matters, how often it should be done, and the best practices for keeping your draft coffee system operating at its best.
Why Coffee Keg Cleaning Is Important
Coffee contains natural oils, organic compounds, and microscopic particles that remain inside the keg after use.
Over time, these residues can:
- Alter coffee flavor
- Reduce aroma quality
- Restrict beverage flow
- Affect dispensing pressure
- Increase cleaning time if ignored
Routine coffee keg cleaning protects both beverage quality and equipment performance.
How Often Should You Clean a Coffee Keg?
Cleaning frequency depends on how often the keg is used.
Daily Use
If your coffee keg is dispensing coffee every day, rinse external dispensing components regularly and perform a complete cleaning every time a batch is replaced.
Weekly Use
For occasional home use, clean the entire coffee keg system after each finished batch.
Long-Term Storage
If the keg will not be used for several weeks, clean, dry, and store all components before putting them away.
Consistent maintenance is easier than removing heavy residue later.
Equipment You'll Need
Before starting, gather the following supplies:
- Food-safe keg cleaner
- Warm water
- Soft cleaning brush
- Microfiber cloth
- Small brush for fittings
- Replacement O-rings (optional)
- Food-grade lubricant (if recommended)
Avoid abrasive materials that may scratch the interior of a stainless steel coffee keg.
Step 1: Empty the Coffee Keg
Begin by completely emptying any remaining coffee.
Never leave old cold brew sitting inside the keg for extended periods.
Discard leftover coffee and release any remaining pressure before opening the lid.
Safety should always come first when servicing a pressurized coffee keg.
Step 2: Disassemble the Coffee Keg System
For a thorough cleaning, remove:
- Lid
- Beverage dip tube
- Gas dip tube (if applicable)
- Posts
- O-rings
- Faucet or tap components
Disassembling the coffee keg system allows every surface to be cleaned properly.
Take note of each component's position to simplify reassembly.
Step 3: Wash the Interior Thoroughly
Fill the keg with warm water and an approved food-safe cleaning solution.
Allow the cleaner to soak according to the manufacturer's instructions.
Using a soft brush, gently scrub the inside of the keg.
Pay close attention to:
- Bottom corners
- Weld seams
- Lid opening
- Interior walls
These areas may collect coffee residue over time.
Step 4: Clean the Dispensing Components
Your cold brew dispenser deserves just as much attention as the keg itself.
Clean:
Faucet
Coffee oils can accumulate inside the faucet.
A small cleaning brush helps remove buildup.
Beverage Lines
Flush cleaning solution through the beverage tubing.
Follow with clean water until no cleaner remains.
Quick Disconnects
Inspect connectors for residue and rinse thoroughly.
Routine coffee line cleaning helps maintain smooth dispensing and consistent flavor.
Step 5: Inspect Seals and O-Rings
While the keg is disassembled, inspect every seal.
Look for:
- Cracks
- Dryness
- Flattening
- Discoloration
Damaged O-rings may lead to leaks or poor pressure retention.
Replacing inexpensive seals before they fail helps maintain reliable performance.
Step 6: Rinse Completely
After cleaning, rinse every component with clean water until all traces of cleaning solution have been removed.
Any cleaner left behind may affect the taste of the next batch of cold brew.
Proper rinsing is one of the most important steps in coffee keg cleaning.
Step 7: Allow Components to Dry
Air drying is recommended whenever possible.
Place all components on a clean drying rack or towel.
Ensure moisture has evaporated before reassembly or long-term storage.
Dry equipment helps reduce the risk of unwanted odors or residue.
Common Coffee Keg Cleaning Mistakes
Even experienced users sometimes develop habits that reduce equipment performance.
Avoid these common mistakes.
Skipping Regular Cleaning
Waiting until problems appear often makes cleaning more difficult.
Using Abrasive Pads
Scratches inside a stainless steel coffee keg can trap residue over time.
Always use soft cleaning tools.
Forgetting Beverage Lines
The keg may be spotless while the beverage tubing still contains residue.
Clean the entire draft coffee system, not just the container.
Ignoring O-Rings
Small seals have a major impact on pressure retention and leak prevention.
Storing a Wet Keg
Allow all components to dry completely before storage.
Additional Maintenance Tips
Beyond routine cleaning, good maintenance extends the life of your equipment.
Best practices include:
- Store the keg with the lid slightly open when dry.
- Replace worn seals promptly.
- Inspect fittings before each batch.
- Use filtered water for rinsing.
- Clean immediately after finishing a batch instead of waiting several days.
These habits make future coffee keg cleaning faster and easier.
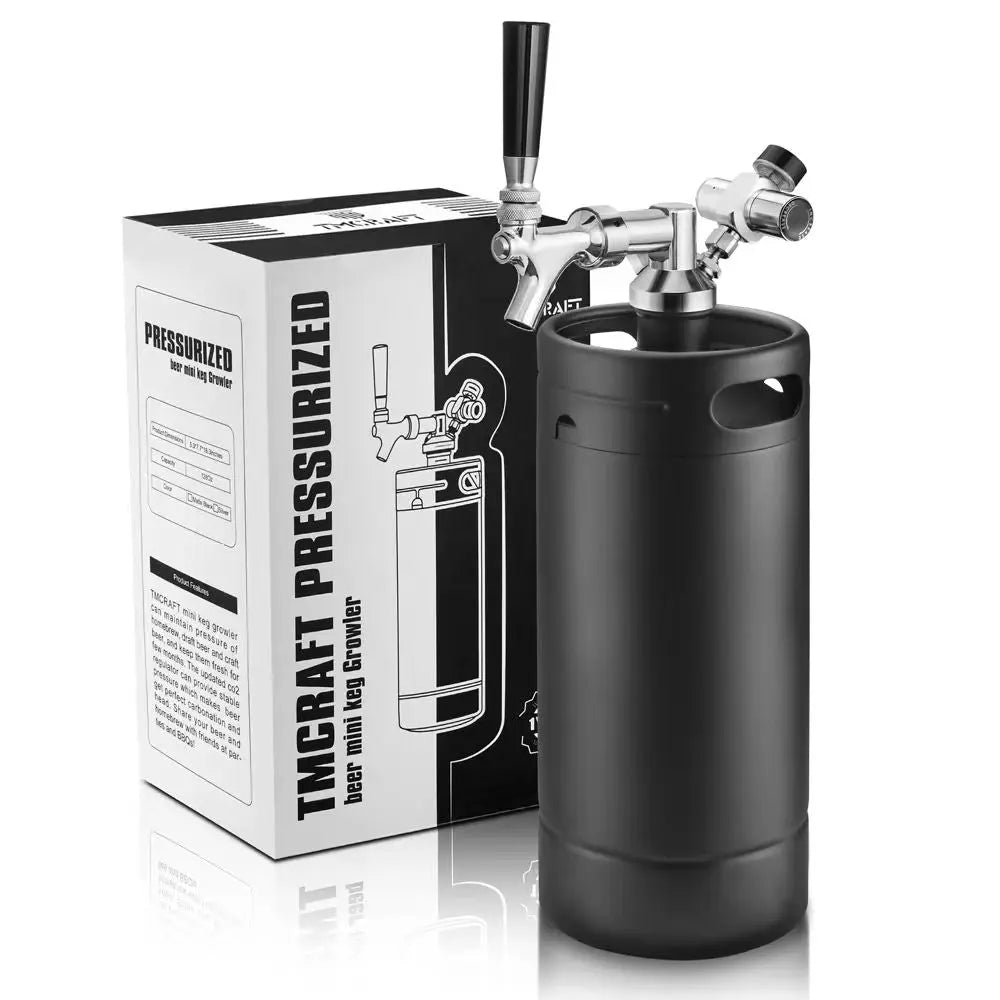
Why TMCRAFT Coffee Kegs Are Easy to Maintain
TMCRAFT coffee kegs are designed with user-friendly maintenance in mind.
Features include:
- Food-grade 304 stainless steel construction
- Smooth interior surfaces for easier cleaning
- Durable pressure-resistant design
- Easy-to-remove lid
- Compatible with non-threaded N2 and N2O cartridges
- Replaceable seals and fittings
- Portable design for home or commercial use
These features simplify cleaning while helping preserve the quality of every batch of cold brew.
Frequently Asked Questions
How often should I clean my coffee keg?
A complete coffee keg cleaning is recommended after every finished batch of cold brew.
Can coffee residue affect flavor?
Yes. Coffee oils and residue can gradually change the taste of fresh cold brew if the keg is not cleaned regularly.
Do I need to clean the beverage lines?
Absolutely. Coffee line cleaning is essential for maintaining flavor and proper dispensing.
Can I use household soap?
It's best to use food-safe cleaners specifically designed for beverage equipment to avoid residue and unwanted flavors.
How long does coffee keg cleaning take?
Most home users can complete the process in approximately 20–30 minutes, depending on the size of the coffee keg system.
Conclusion
A premium coffee keg is an investment in better cold brew, but consistent performance depends on proper maintenance. Regular coffee keg cleaning helps preserve flavor, protect equipment, and ensure every pour reflects the quality of your carefully brewed coffee.
By cleaning the keg, beverage lines, faucet, and fittings after each batch, you can prevent residue buildup and maintain a reliable draft coffee system for years to come. Simple maintenance also reduces the likelihood of leaks, clogs, and inconsistent dispensing.
TMCRAFT coffee kegs are built with durable stainless steel construction and easy-to-maintain components, making routine cleaning straightforward for both home enthusiasts and commercial users. With a regular care routine, your coffee keg will continue delivering fresh, smooth, café-quality cold brew from the first glass to the last.
Link to: How to Serve Café-Style Nitro Cold Brew at Home with a Coffee Keg